Anthropologizing: Intelligencer Coat

Wednesday, April 4, 2012


Good evening, mah dears! 
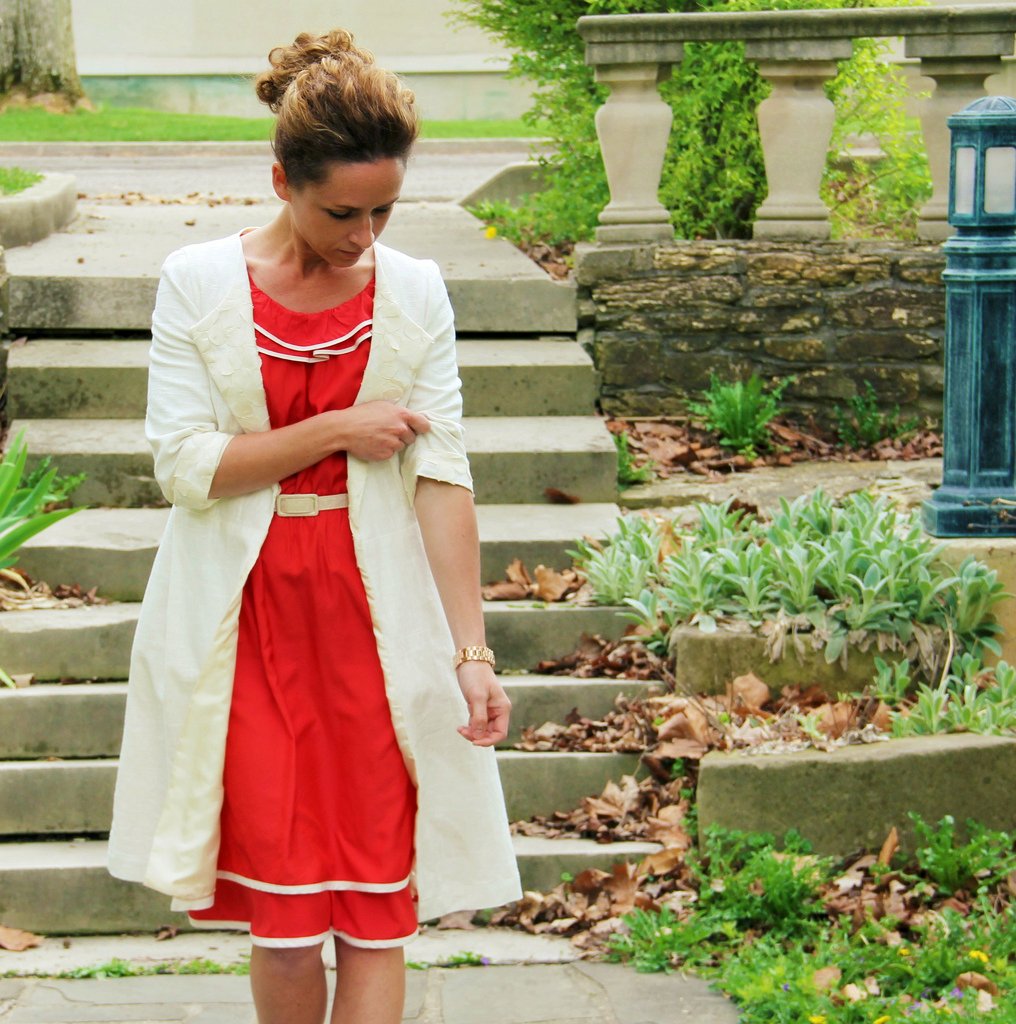
It's been months since you voted for the Intelligencer Sweatercoat to be my next Anthropologizing project. I put it off because I wanted a spring version of the jacket since I live in the Midwest where sweatercoats are practically useless against the weather.  Besides, I really wanted a project to use the cutout fabric I created and thought the detailing on the collar and cuffs made this the perfect option.


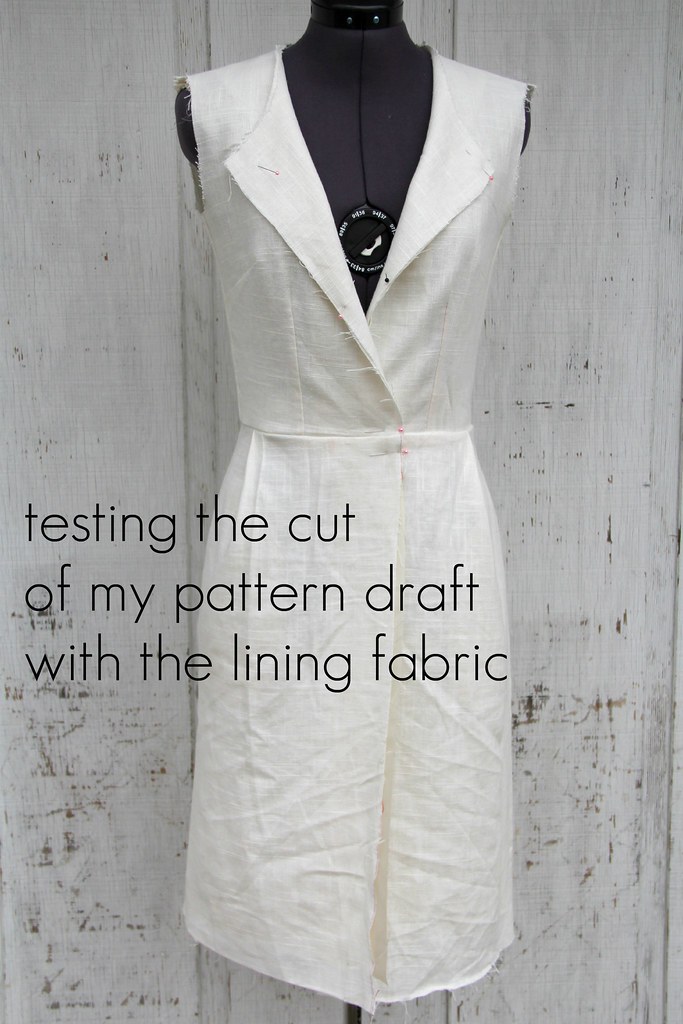
Based on the reviews I read online about the drape, I gave the bottom of my jacket a more definitive shape with less fullness, which I really like because I can leave it hanging open more like a swing coat from the1960's without it looking like a complete sack. HA.


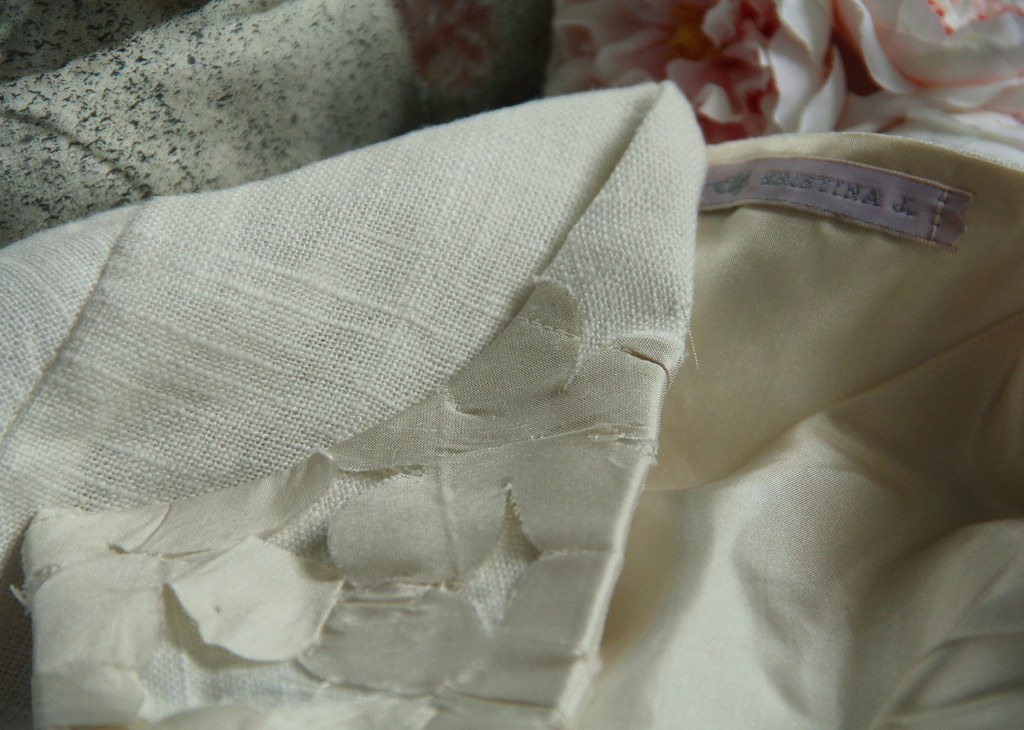
Can't tell you how ecstatic I am about this floral cutout detailing on the collar and cuffs. It's just so quintessentially feminine and the silk flowers play perfectly against the rougher texture of the linen. 


So, what do you think? Would you wear a spring version of the Intelligencer Coat?


follow button
    [rss feed] [pinterest] [email] [Kristina J]

Anthropologizing Target: Voluminous Scarf

Tuesday, August 16, 2011

When I spotted this polka-dot Merona scarf at Target, I knew it would be perfect to recreate the Voluminous scarf from Anthropologie. Making this scarf was super-easy, so I included really particular instructions in case some of you darlings want to rock your own mad sewing skills.

The Anthro version used all one color wooden beads, but my pack came with these three colors and I didn't want to buy three packs of beads just to have enough of the brown color. The beautiful thing about recreating? You can do whatever you want!

Most scarves are made of really delicate, woven fabrics, so this row of stitching gives you a strong base to hold it all together.

I used the entire thickness of an embroidery strand. You don't want your thread breaking and sending your beads everywhere.

Pinch the end into a tight ball and wind thread around several times. Make your strands various lengths. I used 25 beads for the first row, 28 for the second and 31 for the third.


You can triple wrap the scarf like this or simply double-loop it for a fuller look.
That's it! Pretty easy, huh? Now go get a scarf and make one for yourself! =)

Anthropologizing Walmart 2

Tuesday, May 17, 2011


After last week's tutorial on the Hibiscus sandals,
I got a request from a reader to do a tutorial on
how I would imitate the Rose Remnant Sandals.

Obviously, I went with different colors all together,
but I wanted to use the sandals and the
great teal ombre ribbon I already owned.

I put a little fold in the middle to give each tri-fold layer more dimension.
If you don't own a sewing machine, you can do this step with a needle and thread also.

Your rose should look like this when you're done with all three layers.

Ideally, I would have used a single piece for the center,
like a small brooch or chandelier earring,
but I didn't have time to get to the mall and already had
several beads in this color, so I went with it.
If you decide to use individual beads,
the trick is to tack down only two or three together.
Work your way around the center of the flower until the
beading covers as much space as you want.


Kristina J. Copyright 2014

Kristina J. DIY Ideas | DIY Style All rights reserved © Blog Milk Powered by Blogger