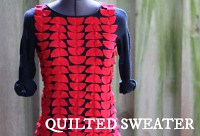
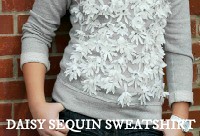
This sweater is a piece I built as a part of the tiny
eight-piece collection I'll be premiering soon,
so I thought now would be a good time for this tutorial.
I constructed this sweater knowing I would embellish it this way,
but you can use this technique with any t-shirt or felted sweater you own.
There are a hundred ways to do this, and none of them are right or wrong,
'cuz it's really about giving something a bit of flare and dimension.
Don't worry about it being super precise.
As you can see, I used paper towel to make a pattern
because it's thicker and more durable than tissue paper,
and ya know...it just happened to be real handy.
You can make your pattern any shape you want--
circles or flowers with pointy petals.
I used this shape for the extra flutter, simply because
the details get lost when you're using black fabric and I
wanted to make sure the flowers stood out.

For this sweater, I cut out 11 flowers that were 3 inches in diameter.
If you want a fluffier effect, cut out bigger flowers.

I wanted the central flower at the neck to be a bit bulkier
than the others, so I combined two flowers and tacked
them down with my sewing machine to make sure they stayed put.
(You could actually tack this by hand, I'm just kinda OCD about my stuff not falling apart.)

I started with the doubled flower and went from there.

Always, always, always try your stuff on before you
permanently tack it down. I'm just sayin'...
You'll save yourself a lot of ripping out
time if you make sure everything is placed where you want first.
(No one wants a fluttery flower, no matter how pretty, stickin' out
from an awkward place, know what I'm sayin'?)
Try it on first!

This is another step you could skip, but something I did
with the bottom flower just to change things up a bit.

So, do you think you'd ever try something like this?
Do you buy things and change them up
or are you just as happy to buy and wear?
I'm kinda startin' to think I have a problem,
'cuz I mess with everything I buy...