
I was amazed by the
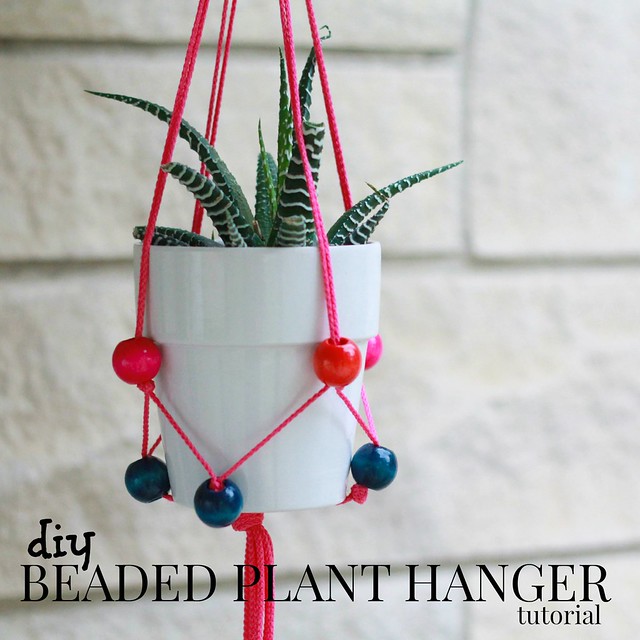
wooden bead plant hangers posted on Design*Sponge a while ago. Mine isn't near as fancy, but I was looking for a way to introduce navy into the pink and purple color scheme of my backyard patio and this project came to mind. The steps to create the beaded plant hanger are very similar to my post on braided plant hangers. Enjoy!

--key ring
--potted plant or ivy
1. Fold length of cord in half, then fold in half again. Insert one end into key ring and tie into a tight knot.
2. Gather two strands together and thread wooden bead onto strands. Tie a knot below bead. You might need to double knot to prevent beads from sliding below the knots. Repeat three times for remaining strands.
3. Gather one strand from knotted strand and join with one strand from adjacent set of knotted cord about 3 inches below previous knot. Thread a bead to strands.
4. Tie knot below new set of cords. Repeat step 3 and 4 until all cords are combined and tied.
5. Knot all strands together to form base of planter. DONE.
More projects from the DIY Patio Edition


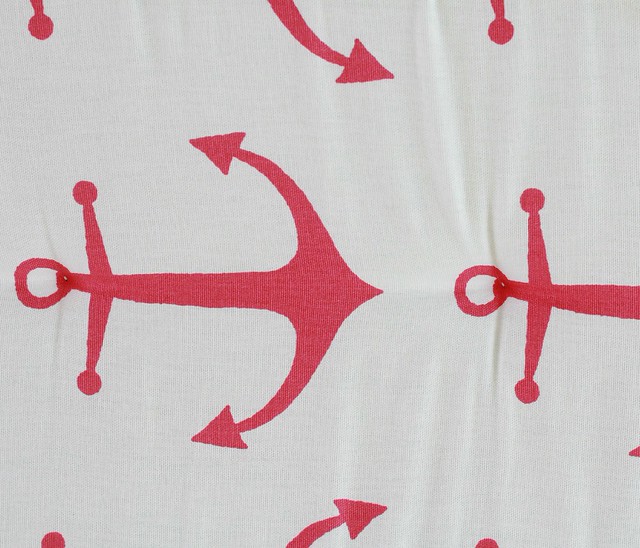
I did NOT want to make a bench cushion for my patio. Ugh...seriously. I wanted to find a perfectly pink anchor printed bench cushion in exactly the size I needed for
my IKEA patio table with one click of a button online. Unfortunately, such a bench cushion was not to be found. This was my first try at a tufted cushion and since I don't have any experience with upholstery, there were some mistakes along the way, but in the end I'm really happy with the way it turned out.
WHAT YOU NEED
1. Fold fabric lengthwise so the print is lying the way you want on what will be the top side of cushion. Lay foam on top and cut fabric 1.5 inches away from foam edge all the way around. This allows for a 1/2 inch seam.
2. Cut three 22 inch sections of ribbon and pin one to bottom side at center and the other two at each end.
3. Stitch across ribbon at center 3-4 inches to secure to bottom of cushion.
4. With right sides together, stitch around edges of cushion leaving 10-12 inches open along center of long edge.
5. Trim seam allowance. Turn right side out and press edges crisp.
6. Insert foam into fabric cushion.
7. Pin open edges together and top stitch close to edge.
To make tufts:
8. Knot double threaded needle and insert from bottom to top in position where you want the tuft on top side.
9. Put needle back down close to original hole to bottom side. Repeat step 8 and 9. Pull really tight to force fabric toward bottom side of cushion.
10. Tie thread in tight knot. Triple knot. Leave thread ends at least one inch long.
11. Space tufts evenly to create this bunching effect. DONE.
More projects from the DIY Patio Edition


I'm not ready to go all-out original macrame, but most
recent Pinterest versions I've seen of these whimsical hangers have had me itching to get my hands on some cord and try it myself. There are some really complicated versions out there, but this tutorial is super easy and modern.
WHAT YOU NEED
--10 yards of twine, parachute cord or piping
--One key ring
--One ceramic planter

WHAT YOU DO
1. Fold the entire length of cord in half. Fold in half again. Thread one end of cording through a key ring and tie in a knot.
2. Determine how long you want your planter bowl to hang and mark the cord at that point with tape. (Mine was really short because I wanted to hang them along the edge of my patio awning but still allow for my children to run under them.) Join two strands of cord and tie in knot at the tape marking. Repeat three more times for the remaining cords, making sure the knots are even with each other.
3. Take a cord from one knotted strand and join it with a cord from the next adjacent knotted strands. Knot these two cords together 3-4 inches down from the first knot. It's a little like braiding! Repeat until all strands are knotted.
4. Group all strands together and knot to form bottom of hanger. Trim the ends to desired length. DONE.

Buy a small planted pot or plant your own using succulents and a cactus in a ceramic serving bowl like I did.

More projects from the DIY Patio Edition

WHAT YOU NEED
Start by cutting the ribbon into two 22 inch sections.
1. Measure chair seat and trim cushion to fit. Lay square foam on top of fabric and cut one inch away from foam edge.
Chic Girl's Tip: Pay attention to print placement. I wanted a pink stripe down the center so I made sure the center of the foam square was lying with a pink stripe in the center before I cut.)
2. Stitch along three sides leaving back edge of seat cushion open. Trim with pinking shears.
3. Fold ribbon in half and place on inside of back edge with folded portion even with raw edge of fabric.
4. Stitch along back edge, leaving a space open to insert cushion.
5. Turn right side out and press seams crisp.
6. Fold unstitched edge to inside and press crisp.
7. Insert foam square into fabric cushion. You can fold the cushion in half to insert, then unfold inside fabric, matching foam corners to cushion corners. Stitch close to edge to close raw edge with cushion inside the fabric.
8. Smooth wrinkles and press creases lightly. DONE.

Attach the cushion to your chairs by tying ribbons in knot around the chair base and enjoy your sweet tea on soft cushioned chair!


Other projects from the DIY Patio Edition
Kristina J. Copyright 2014