


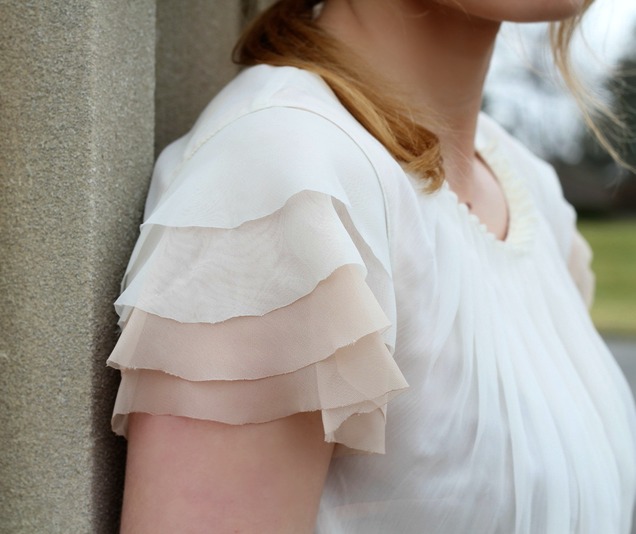
I wanted to post a tutorial on how to insert sleeves into a sleeveless dress because it's totally easy to do (even if you're not the most skilled seamstress) and can make any dress a stand-out piece. You can do this with most sleeveless dresses, as long as the edge of the fabric comes closer to the shoulder than the neck.
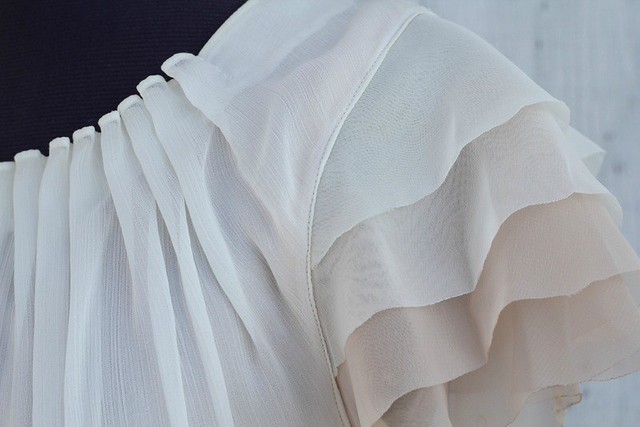
For this dress, I cut out bell sleeves on the bias to make the edges extra fluttery...and flutter sleeves are romantic and sort of ethereal...especially when constructing them of layered chiffon.
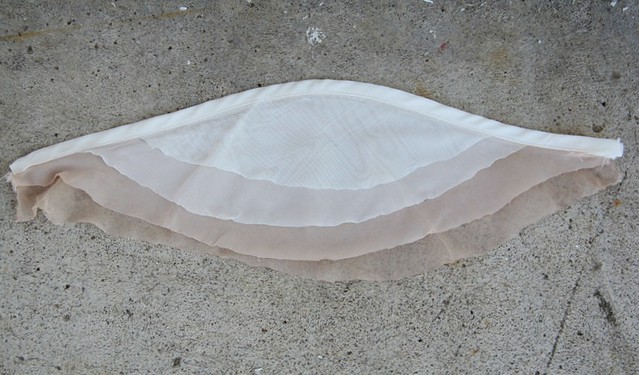
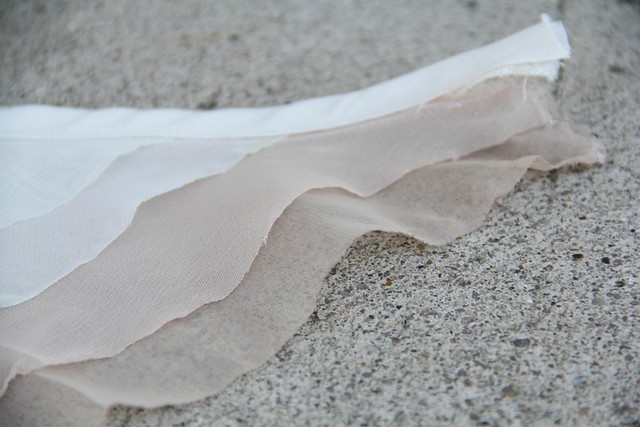
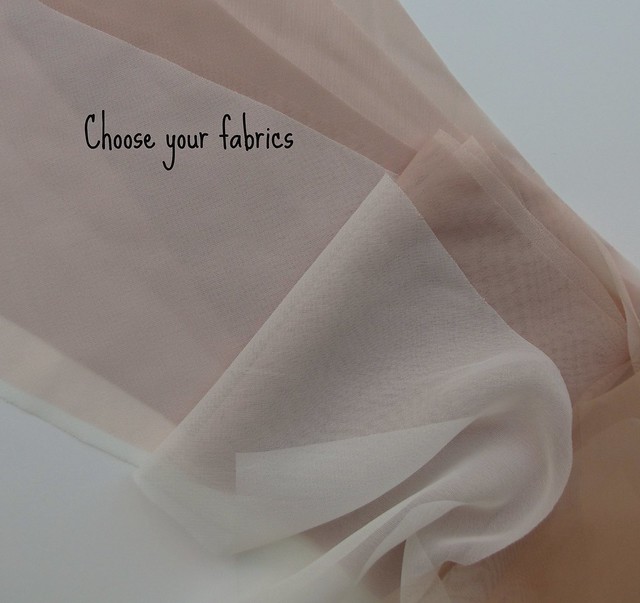
1. Using a bell-shaped pattern as a guide, cut the bottom, longest layer first. Then use that as your pattern for the top layers. Each layer is one inch shorter than the previous layer. The bias will give the edges a bit more flutter. I used the same color for the top two layers.
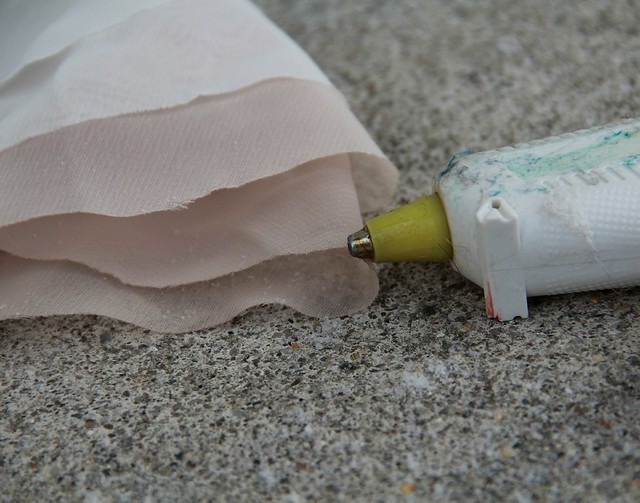
2. Run the tip of a hot glue gun along all edges of chiffon fabric to sear and prevent fraying. Make sure you don't have any glue in the gun.
3. Baste all layers of sleeve together along top edge, then cover with bias tape. This will prevent the seam allowance of your sleeves from unraveling.
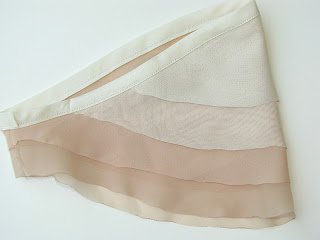
4. With right sides together, machine stitch ends of sleeve together. Press seam flat.
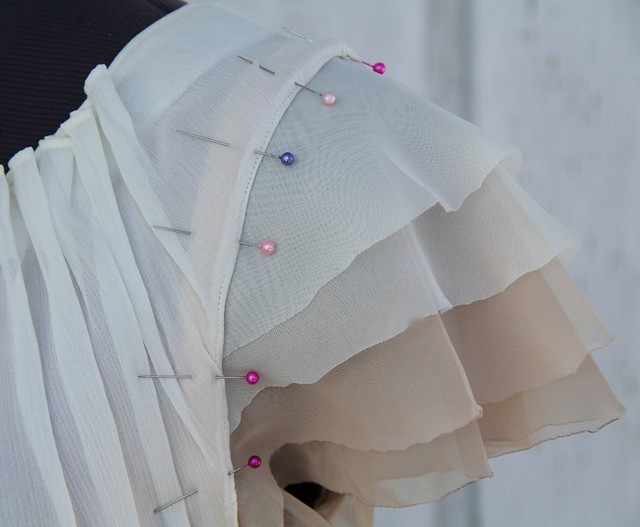
5. With right sleeve side to wrong garment side, pin completed sleeve to inside of armhole opening so that bias trim is not visible. Make sure the bias tape is hidden all the way around.
6. Edgestich close to fabric edge on right side of garment to secure. Lightly press.
7. Repeat for other sleeve.
8. DONE.


The dress is beautiful and I am so excited about the possibility of adding sleeves to a sleeveless dress! Thank you.
ReplyDeleteI recently started following your blog and love looking through your modest and inspiring outfits.
Lovely!
ReplyDeleteSo loving your photos! Your boys do a great job. :)
This is pretty and fantastic!
ReplyDeleteThank you for sharing this! After seeing your last post on this dress, I bought a couple of sleeveless dresses, and I'm looking forward to trying out this technique. Thank you again!
ReplyDeleteI saw your Drifting By creation yesterday. It's so pretty Kristina! Thanks for showing us how to create flutter sleeves. Now, I just need to get myself motivated!
ReplyDeleteI love this! I'm just curious on how you finished the edges? Or did you?
ReplyDeleteNatasha ~ Required2BeInspired
Did you finish the edges. Check out my blog, please. I'm a seamstress/tailor/designer, too.
ReplyDeleteLove from Oregon,
Danielle
xoxoxoxo
Blue Period
I left the edges of the sleeves unfinished...just a small amount of heat to sear the fray's.
ReplyDeleteThe older I get the less flattering sleeveless looks on my flabby bat wing arms. This is such a great option.
ReplyDeleteI do have a question. How do you know how wide to cut the sleeve pattern? Is there an easy way to figure this out?
thanks
mary
Very pretty! love it!
ReplyDeleteYou always amaze me so much!!
ReplyDeleteLove this! Very lovely. Pinning for future reference. :)
ReplyDeleteRebekah
Mary, I think the safest bet would be to use a printed bell sleeve pattern from Jo-ann's or wherever that you already know works great for you. I measured the sleeve circumference just to make sure my sleeve would be close to the same size. Armholes can be shaped differently depending on the dress, so I'd just double check everything before you cut.
ReplyDeleteSimply lovely! I do have a question, though. Will the chiffon fray? Did you use fray guard?
ReplyDeleteLOVE this!! I'll be interested to hear if there's any fraying after washing it.
ReplyDeleteAwesome tutorial! Thank you so much!
ReplyDeleteYour tutorial was just beautiful! I was just thinking the other day that my least favorite part of garment construction is the sleeves. Ugh. Everything else I can hum right along through...but those sleeves make me bit my bottom lip and think hard every time. Love that you make it look so easy - and beautiful!
ReplyDeleteMadison--I seared the edges with heat using a lighter to keep them from fraying.
ReplyDeleteLove your fabric choice. What elegant sleeves!
ReplyDeleteThese are fabulous! Thanks for linking up to {Sew} Modern Monday and have a great week!
ReplyDeleteGreat job! They are beautiful! I can't wait to try some. =)
ReplyDeletewww.sewdivertimento.blogspot.com
Very very beautiful & modest! I'm glad I found my way over to your blog :)
ReplyDeleteThis is so pretty - thanks for sharing at www.thestuffofsuccess.com
ReplyDeletelove this! so pretty and whimsical.
ReplyDeletei would love for you to come link up this or any other amazing project at my creativity party going on right now!
letbirdzfly.blogspot.com
thanks so much for sharing!
That is beautiful.
ReplyDeleteI'd love to have you share this and any other of your amazing posts over at my linky party Create and Share. It posts every Wednesday. We open the party Tuesday evening at 8 pm for those who like to link up early. Hope you stop by...and follow too! ;-)
http://thetrendytreehouse.blogspot.com/2011/09/create-and-share-features-too.html
Tara @Trendy Treehouse
http://thetrendytreehouse.blogspot.com
Thanks for sharing this tute. I saw 2 dresses recently in stores that had chiffon sleeves. One short and one to elbow with dress material, then the chiffon. With your tute I think I could work out how to do both and I like your layered short version- so romantic!
ReplyDeleteWow, I really learned something new with this. It turned out so elegant, I've got to try it! Epitome of gorgeous. Thank you for sharing this! <3
ReplyDeleteWhat a neat idea, and your tut looks "sew" easy, I might have to give it a try :D
ReplyDeleteVisiting from JUST A GIRL linky party,
~Suzanne in NW Illinois
SOOOO Pretty! Love! Jamie @ theletter4.blogspot.com
ReplyDeleteJust so lovely!!! I'm not so good at sewing (can't sew anything straight!) but definitely going to try this :) Thank you so much for sharing the tutorial!
ReplyDeleteGorgeous! If I had even an ounce of sewing talent I would be all over this! Love it! Thanks so much for sharing with the Pink Hippo Party.. can't wait to see what you share next!
ReplyDeleteSo pretty! I love this idea so much I am pinning it. Found you via Making Mondays Marvelous at CRAFT.
ReplyDeleteThis is very helpful thank you! Have you tried sleeves out of something that is not chiffon that you may have to hem? I'm a new follower from Making Mondays:)
ReplyDeletelovely!
ReplyDeleteVery lovely! Thanks for the great tutorial! I never would have thought to layer those pretty fabrics for a sleeve.
ReplyDeleteI would love if you would share with my Blog Stalking Thursday Linky Party. http://thecraftyblogstalker.blogspot.com/
See You There!
Wow! What a beautiful sleeve! Ruffles are very in and I am VERY obsessed with them. :) Thank you for the tutorial. I would love for you to link up at my Savvy HomeMade Monday blog party next week. I hope to see you there!
ReplyDeleteI was so excited when I found this, because it's exactly what I need - then I realized the photos aren't working! Please fix it soon so I can follow it!
ReplyDeleteI'm a bit scared about the idea of searing the edges with a lighter though - I can see my chiffon going up in smoke!
As the user above said, exactly what I need but the photos aren't working :(
ReplyDeleteI soooo love this! Thank you! I'm gonna make myself some nice shirt for this summer. And I'm also going to make one for my best friend her birthday.
ReplyDeleteThanks!
Thank you so much for sharing this sleeve pattern! I've been looking for something similar but I will be substituting the chiffon layers with laces.
ReplyDeleteWhat a lovely effect - you make it look easy enough to try for a beginner. Thanks for the tutorial!
ReplyDeletesoooo beautiful! cant wait to try this!
ReplyDelete~Amy
www.LadyMockingbird.com
Could you do this out of a thinner cotton and it still look nice? Or do you just suggest to do a basic sleeve?
ReplyDeleteThis is gorgeous!
ReplyDeleteYou helped me A LOT.
ReplyDeletegreat idea.... Thank's
ReplyDeletei'll try this
your pics arent loading.
ReplyDeleteHi-very pretty!
ReplyDeleteHow do I figure out the top curve?
Some tutorials show the curve of the pattern going the opposite direction-almost like a smile vs yours looking more like a hilltop (if that makes sense). What's the difference? does yours lay more flat on the shoulder?
nice.. would be great for 1920's dress
ReplyDeleteI left a comment (but not sure it worked). Do you think it would be possible as well to add sleeves to a strapless dress ? Thank you so much !!
ReplyDeleteI'm making a sleeveless dress from stretch satin that I want to add flutter sleeves to, and your tutorial looks like just what I need! I want to just use the same stretch satin fabric and only make the sleeves one layer (although I love your layered sleeves!). Your advice: would you still cut the fabric on the bias? Thanks for the inspiration!
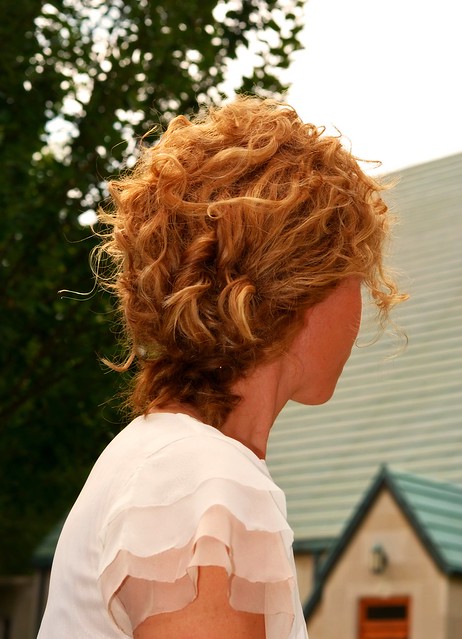
ReplyDeleteWould you please show step by step how to do your hair at the top of this sleeve tutorial...beautiful
ReplyDeleteThank you so much! Especially the tip about searing the edges with the heat of a glue gun with no glue! Genius!!
ReplyDeleteThis comment has been removed by the author.
ReplyDeleteOMG! You are a sewing genius. Your method of using a pattern and cutting layers is great. The whole set of instructions and photos are very clear and easy to follow. Excellent job!
ReplyDeleteThat is so beautiful!
ReplyDeleteThat's gorgeous. The very subtle ombre adds so much, especially with the sheer nature of that fabric. I'm astounded by how much that adds.
ReplyDeleteThanks for the tutorial, I'm cutting down a maxi tulle skirt to midi length and wanted to reuse the tulle for a sweater vest sleeves.